Staying Lean Over the Holidays!

November 24th, 2021 by Debbie Martilotta

Most people gain fat during the end-of-year holiday season. They eat anything and everything in sight. But, you don’t have to be “most people.”

Here is how to start off the New Year lean!

You can either make excuses (we all do this easily enough, especially during the holidays) or you can take positive action. Which one is most likely to happen if you are prepared, have a goal, and have a plan?


When you’re prepared, you can still indulge and enjoy your favorite holiday foods without your fitness goals falling apart.

A nutrition program high in fiber is a vital key to any fat loss plan. Fiber helps you to feel full, making it easier to eat fewer calories. In addition, more calories are burned from digesting high-fiber foods. Good sources of fiber include lots of veggies and plant materials.

Getting enough of the good fats will help you lose fat, build muscle, and recover faster from your workouts.

Good fats include: polyunsaturated (especially Omega-3’s), such as those from fish and nuts, as well as monounsaturated fats, such as those from peanut butter, olive oil, egg yolks, and fish oil. There are lots of ways to be smart about eating fat. The key is knowing what to look for. A few of my favorite fat sources include:

  • Avocados
  • Avocado oil
  • Salad dressing made with avocado oil
  • Olive oil
  • High-quality lard and tallow from pastured animals
  • Grass-fed meats
  • Grass-fed butter
  • Coconut oil
  • Coconut butter
  • Flaxseed Oil
  • Walnuts
  • Almonds

An increase in your protein intake will boost your metabolism and help to maintain your muscle mass, both key ingredients in losing fat and keeping it off.


Think Can You Out-Train Your Diet?

November 18th, 2021 by Debbie Martilotta

People often come to me saying they need to “work out more” to lose weight. And many of them shed plenty of pounds in two half-hour weekly personal training sessions with me. However, the truth is that you CANNOT out-train your diet, no matter how hard you work.

You simply cannot burn enough calories to eat like King Henry. I know this from personal experience and the science behind strength training! Strength training DOES elevate your metabolism, and replacing fat with lean muscle developed through a rigorous strength training program will certainly make you LOOK, and feel, slimmer.

But a good personal trainer will not leave nutrition out of the equation. I coach my clients to remember that “real food” doesn’t have an ingredient label!

Sometimes, even when your caloric intake isn’t the problem, there are other things that interfere with weight management. I help clients determine what’s beating them in the battle of the bulge. Here are a few things to consider:

  • Allergies – Are you having a difficult time shedding pounds? You may have some food allergies. To find out you can start by removing wheat, grain, and dairy (these are the biggest culprits) from your diet for two to three weeks. Also eliminate corn, soy and consider nixing additives such as food coloring and preservatives.
  • Bad Breakfast – Another habit that sets you up for failure is eating too many carbs at breakfast, which leads to spikes in insulin levels and sets you up for cravings later in the day. It’s best to have protein and healthy fats in the morning. An omelet (with the yolk), or a smoothie blended with healthy fats such as avocado, almond butter, coconut oil, or MCT oil would be a much better option than cereal or a muffin, even the healthy, whole wheat kinds.
  • Trans fats have been shown to raise bad cholesterol (LDL) and lower good cholesterol (HDL), factors that contribute to the risk of developing heart disease, stroke, and Type 2 diabetes.

Your best bet for avoiding partially hydrogenated oils:

  • Shop the periphery of the store. Stick to whole food items in the produce, meat, and dairy departments. Bring home foods that are as close to their original state as possible.
  • Read the label and the ingredient list. Check for the grams of trans fats per serving, avoid anything over 0 grams (if it is within your power to do so), and even if the grams says “0,” ensure that the ingredients do not list any “partially hydrogenated” oils.
  • Cook your own foods from scratch. The best way to avoid trans fats is to prepare foods the old-fashioned way with natural ingredients like how your grandparents would have done. This is the only way to really control what goes into your body.
  • Select products with the fewest ingredients. More is not necessarily better.
  • Avoid processed foods that come in a box, bag, or can.
  • If it contains ingredients that you can’t pronounce, it’s probably to be avoided.

Looking for a personal strength trainer in the Grand Rapids area to help you navigate nutrition and get you working out in two half-hour sessions a week? Contact me to get started!


One Pot Braised Pork with Root Vegetables

November 1st, 2021 by Debbie Martilotta

Ufinished one pot braised pork with root vegetables recipesing the gorgeous root vegetables and squashes of fall, let’s make a one-pot braised pork roast that takes comfort food to the next level.

Ingredients

  • 2 3/4 lb. pastured, hormone-free bone-in pork butt or shoulder
  • 1/4 cup spicy mustard
  • 2 Tbsp. dijon mustard
  • 2.5 Tbsp. avocado oil, divided
  • 2 tsp. apple cider vinegar
  • 2 Tbsp. chopped sage
  • 1 Tbsp. chopped rosemary
  • 2 tsp. thyme leaves
  • 4 cloves garlic (minced) plus 6-8 whole cloves
  • 1 tsp. salt
  • 1 tsp. black pepper
  • 1 apple
  • 1 small onion
  • 1/2 cup chicken bone broth
  • 4+ cups of your favorite root vegetables, cut into 1” cubes

Directions

Preheat your oven to 425 degrees.

Rub your pork with a tablespoon of avocado oil. In a small bowl, combine the spicy mustard, dijon mustard, apple cider vinegar, sage, rosemary, thyme, minced garlic, salt, and pepper.

Rub the mustard mixture all over the pork.

Make slits all over the pork with a knife and place the whole garlic cloves in the slits

Pour ½ tablespoon of avocado oil in a round dutch oven or braising pan and place the pork in the center.

If the pork has a side with more fat on it, place that side facing up. Cut the apple and onion in quarters and place them around the pork.

Bake uncovered at 425 degrees for 40-45 minutes.

Remove the dutch oven out of the oven and flip the pork over.

Add the chicken bone broth and cover the dutch oven. Reduce oven to 325 degrees. Cook for 2 more hours, until the pork, reaches 165 degrees. Check the meat after an hour or so and remove any remaining apple and onion pieces that haven’t broken down. At this time you can add additional broth if you notice too much is evaporating.

Remove the pot from the oven and uncover it. Toss your chopped vegetables in the remaining avocado oil and sprinkle them with salt. Arrange them around the pork in your dutch oven and toss them gently in the juices in the pot.

Cover the pot and place it back in the oven for 40 minutes, or until the vegetables are tender and the pork has an internal temperature of 195-200 degrees.

If the vegetables are tender but the pork is still not tender, you can remove the vegetables and place the pork back in the oven.

Slice or shred your pork and serve with the vegetables and pan juices.

By , Mark’s Daily Apple


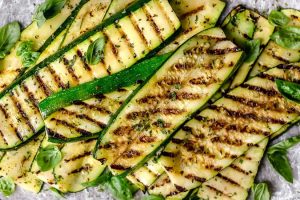
Grilled Summer Squash

September 27th, 2021 by Debbie Martilotta

Ingredients:

1-2 medium-sized summer squash (zucchini or crooked neck)
2 T. avocado oil
1-2 t. Spicy Seasoning (see recipe below) or use your favorite seasoning

Directions

  • Prepare Seasoning
  • Wash and slice squash horizontally in thin strips
  • Brush both sides with avocado oil
  • Sprinkle Spicy Seasoning on one side
  • Preheat grill to medium-high heat
  • Place seasoned side down on grill and grill 5-7 minutes, until beginning to turn brown
  • Sprinkle 2nd side with seasoning.
  • Turn squash over and grill the other side for 5-7 minutes until desired texture.
  • Remove from grill and add more seasoning if desired
  • Serve immediately as a side dish

Spicy Seasoning:

In a small blender combine:

  • ½ c. sea salt
  • 1 T. black pepper
  • ½ t. garlic powder
  • ¼ t. onion salt
  • 1 T. smoked paprika

Blend for 30-60 seconds until seasons are well blended.


Why You Aren’t Seeing Results When Strength Training

July 19th, 2021 by Debbie Martilotta

As a trainer, people often ask me how frequently they need to train to achieve results, and there isn’t one perfect answer: Our bodies are all different, which means they can respond differently to the same stimuli. But if you’re lifting and lifting and still not seeing results in your strength training routine, it’s probably because you’re lacking consistency in your workout or diet or both.

The process of getting stronger doesn’t have to be complicated, but keep reading for the three main reasons you may not be reaching your gains goals.

1. You’re mixing too many different modalities

To see measurable results in any fitness routine, you’ll want to stick with one primary training modality. If you’re only strength training one day a week (and spending your other sessions doing cardio), it’s going to be challenging to build muscle. The reason? Your muscle fibers won’t be exposed to the level of stress they need to grow. Muscle stress is imperative to building strength because it causes micro-tears of your muscle fibers, and when your body repairs these tears, they come back stronger. Most of my clients find success in 2 30-minute sessions with me weekly.

If your goal is to build muscle and get stronger, resistance training is your best bet. If you’re a beginner, working with your body weight is a great place to start, and as you begin to build strength,  you can add more resistance with weights. And to help maximize your results and save time, your workouts should consist of compound exercises, like squats presses, walking lunges with bicep curls, and deadlifts, that target multiple areas at once and force you to exert more energy than the isolated movements that target a single area.

2. Not sticking to a workout plan

Doing the same activities over and over can feel mundane, but it’s necessary if you want to put on muscle and increase your strength—which is why it’s essential to develop a workout plan. For example, let’s say your goal is to strengthen your legs. Doing four sets of 12 deadlifts once isn’t going to make much difference – but doing that same workout for four to six weeks and progressively increasing the weight will.

In addition to your nutrition, you’ll need to focus on your recovery. Properly warming up and cooling down will better prepare you for your training sessions, and help you prevent injury and burnout. Adding mobility work into your routine can also help maximize your performance as you train, improve your overall movement, and reduce and prevent pain and injury.

Another factor to focus on is getting quality sleep; it’s recommended adults get at least seven hours of sleep each night. A good night’s rest is essential for muscle repair and growth. As you sleep, your body secretes a muscle growth hormone, which works to repair the micro-tears that occur from strength training and make your muscles stronger.

And if you’re someone who likes to mix things up, schedule activities where you can do other modalities like yoga, cycling, biking, or running.

3. Not focusing on your recovery and nutrition

Lifestyle variables—like nutrition, recovery, and sleep—also impact your ability to get stronger. You’ll want to make sure you’re eating enough to support your energy needs when you’re training and in your everyday life. Your caloric needs will vary based on your lifestyle and goals, so you will want to work with your trainer on an individualized nutrition plan for you.

Because training is nuanced and individualized, use these tips as a starting point. If you have the access and means, consider working with a certified personal trainer who can provide you with more specific tips and tools to help you reach your fitness goals.

In part from our friends at Well+ Good


Sugar Is Public Enemy #1

April 6th, 2021 by Debbie Martilotta

Congratulations! You’ve decided once and for all to ditch sugar in your diet.

There are three main sugar claims that you may find on food labels: sugar-free, no sugar added, and unsweetened. It’s a common misconception that they mean the same thing, but they’re vastly different. I’ll break it down here.

Sugar-free

When you see “sugar-free” on a product label, it means that the food contains less than half of a gram of sugar per serving size. This includes any type of sugar that could be found in the food. Obviously, the white stuff counts toward the total. So does maple syrup and honey. Naturally-occurring sugars count too, like lactose in milk or fructose in fruits.

Sugarless alternative sweeteners won’t contribute to the total sugar in a product. Those are allowed under a sugar-free label.

The term “sugar-free” is regulated, so if an item says it’s sugar-free, you can be pretty confident that it contains less than half a gram of sugar per serving, but watch your serving size!

No Sugar Added

“No sugar added” means that no sugar ingredients are added during the processing of foods, including sugars from syrups and honey, and sugars from concentrated fruit or vegetable juices.

That doesn’t mean you end up with a product containing zero grams of sugar. For example, a banana could bear a “no sugar added” label, but it actually contains around 14g of naturally occurring sugar.

Unsweetened

An unsweetened food is one that hasn’t been sweetened at all – no sugar, no artificial sweeteners, no natural sweeteners, no zero-calorie sweeteners, nothing that adds to the sweetness of the recipe.

Sneaky Sugar Labeling

That’s not all you want to look out for. “Sugar-free,” “unsweetened,” and “no sugar added” don’t tell the full story.

We tend to think that added sugar is mainly found in desserts like cookies and cakes, but it’s also found in many savory foods, such as bread and pasta sauce. And some foods promoted as “natural” or “healthy” are laden with added sugars, compounding the confusion. In fact, manufacturers add sugar to 74% of packaged foods sold in supermarkets.1 So, even if you skip dessert, you may still be consuming more added sugar than is recommended.

If you want real information about what’s in your food, the next stop should be your label. If your food has a label on it – you should read it! Better yet, eat food without labels by shopping the produce and meat counters in your grocery store and staying out of the packaged isles as best as you can. Click here for my DBM Strength Training eating plan.

The Sugar Science department at UCSF lists 61 Names for Sugar:

  • Agave nectar
  • Barbados sugar
  • Barley malt
  • Barley malt syrup
  • Beet sugar
  • Brown sugar
  • Buttered syrup
  • Cane juice
  • Cane juice crystals
  • Cane sugar
  • Caramel
  • Carob syrup
  • Castor sugar
  • Coconut palm sugar
  • Coconut sugar
  • Confectioner’s sugar
  • Corn sweetener
  • Corn syrup
  • Corn syrup solids
  • Date sugar
  • Dehydrated cane juice
  • Demerara sugar
  • Dextrin
  • Dextrose
  • Evaporated cane juice
  • Free-flowing brown sugars
  • Fructose
  • Fruit juice
  • Fruit juice concentrate
  • Glucose
  • Glucose solids
  • Golden sugar
  • Golden syrup
  • Grape sugar
  • HFCS (High-Fructose Corn Syrup)
  • Honey
  • Icing sugar
  • Invert sugar
  • Malt syrup
  • Maltodextrin
  • Maltol
  • Maltose
  • Mannose
  • Maple syrup
  • Molasses
  • Muscovado
  • Palm sugar
  • Panocha
  • Powdered sugar
  • Raw sugar
  • Refiner’s syrup
  • Rice syrup
  • Saccharose
  • Sorghum Syrup
  • Sucrose
  • Sugar (granulated)
  • Sweet Sorghum
  • Syrup
  • Treacle
  • Turbinado sugar
  • Yellow sugar

In-part from Marksdailyapple.com


How To Cook Eggs Perfectly, Every Time

March 30th, 2021 by Debbie Martilotta

Scrambled eggs can be dry or watery, fluffy, or flat. That goes for other egg methods too – there’s a big difference between an overcooked hard-boiled egg and a perfectly jammy egg. So, here is a tutorial on how to cook eggs perfectly, every time.

Let’s start with the most intimidating of the cooking methods: poaching eggs.

How to Make Poached Eggs

For poached eggs, you want to use super fresh eggs. A fresh egg will have a firmer, tighter white that will stay together better when poaching.

Fill a pot with water no greater than 2 inches high, about the height of a teaspoon if you measure it from the tip of the bowl to the beginning of the spoon handle. Bring the water to just barely a simmer and add a pinch of salt. You should be able to see some bubbles at the bottom of the pot.

Using a meat thermometer, watch for your water to come to around 190 degrees. Then you’re ready to go.

When you can maintain 190 degrees, crack an egg into a small ramekin. Use a large spoon to swirl the water in the pot to break up any bubbles at the bottom of the pot.

Spin the water gently with the spoon in a circular motion around the inside of the pot to create a small vortex so there’s a still spot of the water in the middle and the rest of the water is spinning around it.

In this middle spot, gently press the ramekin into the water as you are pouring the egg into it. Watch your fingers – the water will burn! The lip of the ramekin cup should go under the water as you pour the egg in. The egg will swirl in the pot and the egg white will start to solidify. If the white part is loose and starts to travel around the pot, gently spin the water around the inside edge of the pot again with a spoon to encourage the egg white to stay together.

Set your timer for around 4 minutes. At the four-minute mark, use a slotted spoon to gently pull the poached egg out of the water. The egg is done when the yolk has a nice spring to it and still feels soft and liquidy in the middle, but the white is pretty firm.

Boiled Eggs

When boiling eggs to make hardboiled eggs, soft-boiled eggs, or jammy eggs, it’s best to use eggs that have been in the refrigerator for at least 2-4 weeks, as they will be easier to peel. (If you bought them at the grocery store, there’s a good chance they’re that old by the time they get to you.) Use the float test below to make sure your eggs are still good!

Fill a pot of water about half full with water and a pinch of salt and bring it to a boil on your stovetop.

Once the water is boiling, add your eggs and set your timer.

  • For jammy or soft-boiled eggs, set your timer for 6.5-7 minutes.
  • For hardboiled eggs, set your timer for 10-11 minutes.

Set up a bowl filled with ice and water. Once the timer goes off for your soft or hard-boiled eggs, use a slotted spoon to take the egg out of the pot and plunge them into the cold water. This will help the egg yolk stop cooking. Allow them to cool in the water for around 10 minutes.

Once the eggs have cooled, gently place the egg on a hard surface and roll it back and forth to help the shell crack in a bunch of different places. Carefully peel the cracked shell away. Sometimes running the egg under lukewarm water when peeling or using the back of a spoon helps.

For jammy eggs, slice the egg in half lengthwise. Enjoy as-is, sprinkle a little salt and pepper on top, or spoon out the silky yolk onto a slice of bacon or a salad.

For hardboiled eggs, pack for breakfast or snacks, or slice in half and serve alongside sliced avocado or crispy bacon.

How to Make Fluffy Scrambled Eggs

In a small bowl, whisk together 2-5 eggs and a pinch of salt and pepper if you’d like.

Heat a well-seasoned cast-iron skillet over medium-low heat. Once hot, add 1 tablespoon of avocado oil or grass-fed butter to the pan and swirl it around. After adding the oil or right as the butter is just melted, pour the eggs into the pan so they fill the entire diameter of the pan.

Just as you see the edges start to set against the side of the pan, use a silicone spatula to move the soft egg from the edges to the center of the pan. As you drag the egg from the edges to the center, some cooked egg will be pushed to the center, while the uncooked egg will be displaced to the edges, cooking the egg slowly.

Continue dragging the edges of the egg toward the center of the pan and add about another ½ tablespoon of butter cut into small chunks to the pan. This part is optional, but it helps make the eggs extra creamy.

When the egg mixture is still a bit runny but beginning to firm up slightly, begin folding the egg with a silicone spatula by folding the edges of the egg towards the middle of the pan. This will encourage the egg to cook gently without breaking up into a bunch of tiny pieces. After doing this a few times, turn off the heat and continue folding the egg to the center of the pan to encourage light cooking. The eggs are finished when they are soft and silky. They should have a little gloss to them and be creamy, but still mostly cooked.

Remove the egg from the pan to stop it from cooking and place it on your plate. Top them with a pinch of salt and pepper and serve alongside your favorite breakfast foods. We served ours with an arugula salad and a few slices of crispy bacon.

How to Make a Perfect Omelet

In a small bowl, whisk together 3-4 eggs and a pinch of salt and pepper. Arrange any fillings you want to use in the omelet (we used chopped-up roasted broccoli and organic shredded cheddar cheese).

Heat a well-seasoned cast-iron pan over medium heat. Once hot, add a tablespoon of avocado oil or grass-fed butter to the pan and swirl it around. Right after adding the oil, or after the butter is just melted, pour the eggs into the pan so they fill the entire diameter of the pan.

As the egg cooks, you will see the edges of the omelet turn from translucent to opaque. Lower the heat slightly and watch the egg continue to cook. Once the egg begins to bubble and parts of it begin to firm up slightly, add your toppings to one-half of the omelet.

Carefully flip the half of the omelet without toppings directly on top of the half with the fillings. Allow the egg to cook for an additional 45 seconds to 1 minute.

Use a spatula to carefully flip over the omelet and allow it to cook for an additional minute or so, or until the egg is fully cooked and the cheese filling inside is melted.

Place on to a plate and cut in half, if you’d like.

How to Cook Sunnyside Up Eggs Evenly

Tip: Sunnyside eggs are a little finicky and the time to prepare one to another may vary based on the temperature of the pan, size of the egg, freshness of the egg, etc., so feel free to adjust the time it takes for the white to set.

Heat a well-seasoned cast-iron skillet over medium-low heat. Once hot, add 1/2 tablespoon of avocado oil and swirl it around. After swirling the oil around in the pan, gently crack an egg into the center of the pan.

Allow the edges of the egg white to set and turn from clear to white, but the egg whites around the yolk should still be very runny. When you see this, drizzle a tablespoon or two of water into the pan around the edges of the egg white.

Quickly cover the pan with a lid. Once you hear the water you added sizzle aggressively, turn off the heat. Keep the lid on the pan for 45 seconds to a minute or so, then take a peek at the egg. When the egg is finished, the egg white should be fully set but the yolk still liquidy. If the white around the yolk is not yet set, cover the pan again. If the yolk starts to film over with white, you’ve cooked the egg a little too long.

Serve your egg as is, or dip a piece of bacon or sweet potato fry into the yolk.

How to Make Over-hard Eggs (And Flip Them Without Breaking the Yolk)

Heat a well-seasoned cast-iron skillet over medium-low heat. Once hot, add 1/2 tablespoon of avocado oil and swirl it around. After swirling the oil around in the pan, gently crack an egg into the pan. If you are making multiple eggs at a time, use 1 tablespoon of avocado oil and crack a few eggs into the pan at a time, trying to confine them to different areas in the pan.

Allow the whites of the eggs to mostly set. You’ll see the whites begin to bubble as they firm up. Once the white is fairly set, carefully flip the egg over with a spatula. The whites near the yolk may still be shiny and not set yet, but as long as the edges are set and the whites are bubbling, you should be able to flip the egg over without an issue.

Allow the egg to cook on the other side. Use a finger to feel the yolk in the center of the egg. When it feels firm and no longer springy, the yolk is firm and fully cooked.

Repeat with more eggs, if desired. Serve with your favorite sides.

Tip: For an over easy or over medium egg, simply cook the egg for less time before removing it from the heat. For an over-easy egg, the yolk should feel liquidy when touched. For an over medium egg, the yolk should feel springy like a ball of fresh mozzarella.

Egg FAQs

What’s the Best Kind of Cookware to Cook Eggs?

While there is some less toxic non-stick cookware out there compared to the past, we think a well-seasoned cast-iron skillet is a great option. It is durable, heats evenly, and cooks eggs quickly. For boiling and poaching, a stainless steel saucepan works best.

How Do I Choose the Best Quality Eggs?

Whenever possible, opt for pastured eggs. Chickens that are pastured have the best chance to eat not just packaged chicken feed, but also bugs, roots, and other scraps that make their yolks rich and nutritious. Here’s an article on how to choose the best eggs for your family.

How to Tell the Difference Between a Store-bought Egg and a Farm-fresh Egg

You can often tell the difference between a store-bought and farm-fresh egg by looking at the yolks side by side. A fresh egg yolk will have a rich, deep yellow to orange color, while mass-produced eggs are a much paler yellow. Keep in mind that farmers can add items like marigolds to chicken feed, which artificially turn their yolks more golden or orange.

Do You Have to Refrigerate Eggs?

Eggs in the United States are refrigerated because their protective shell layers are washed off in preparation to be sold. If you get eggs from a farmer or your neighbor, ask if they’ve been washed.

How Long Do Eggs Stay Fresh?

Unwashed eggs are shelf-stable for about two weeks, and they keep for up to three months in the refrigerator.

How Do You Know Whether an Egg Has Gone Bad? The Float Test for Egg Freshness

Eggs have a decent shelf life in the fridge, but how do you know if an egg is still good to use? Oftentimes, eggs can be used beyond their sell-by date, but to be sure, I use the float test.

Fill a large jar with water and carefully place the egg into the water.

  • If the egg sinks to the bottom and rests on its side horizontally, the egg is fresh.
  • If the tip of the egg points directly downward so the egg is vertical in the water, the egg is older and should be used up right away (these are great options for boiling).
  • If the egg floats in the water, it’s spoiled and should be tossed.

If an egg has spoiled, you’ll know the second you crack it. The rotten egg smell is so strong that there’s a good chance you’ll have to open your windows and leave your house until it clears. When in doubt, use the float method. It’s not something you want to experience.

Egg Freshness and Cooking Methods

The freshest eggs aren’t always the best option for every egg preparation.

  • For soft or hard-boiling eggs, opt for slightly older eggs. These will peel more easily.
  • For poached or sunnyside-up eggs, opt for more fresh eggs. This will keep the white tight.
  • For any other cooking methods, you have the flexibility to use whatever eggs you have on hand.

Egg Nutrition Information

For 1 Large Egg:
Calories: 70
Fat: 5g
Saturated Fat: 1.5g
Cholesterol: 185mg
Protein: 6g
Carbs: 0g

From MarksDailyApple.com


Fight Inflammation With Food And Exercise

November 2nd, 2020 by Debbie Martilotta

One of the most powerful tools to combat inflammation comes from the grocery store. Choose the right anti-inflammatory foods, and you may be able to reduce your risk of illness. Consistently pick the wrong ones, and you could accelerate the inflammatory disease process.

What does an anti-inflammatory diet do? Your immune system becomes activated when your body recognizes anything that is foreign—such as an invading microbe, plant pollen, or chemical. This often triggers a process called inflammation. Intermittent bouts of inflammation directed at truly threatening invaders protect your health.

However, sometimes inflammation persists, day in and day out, even when you are not threatened by a foreign invader. That’s when inflammation can become your enemy. Many major diseases that plague us—including cancer, heart disease, diabetes, arthritis, depression, and Alzheimer’s—have been linked to chronic inflammation.

Anti-inflammatory diet

To reduce levels of inflammation, aim for an overall healthy diet. If you’re looking for an eating plan that closely follows the tenets of anti-inflammatory eating, consider the Mediterranean diet, which is high in fruits, vegetables, nuts, whole grains, fish, and healthy oils.

Anti-inflammatory foods

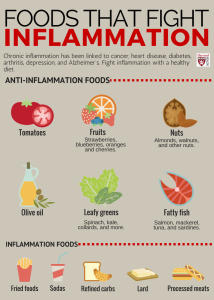
An anti-inflammatory diet should include these foods:

  • tomatoes
  • olive oil
  • green leafy vegetables, such as spinach, kale, and collards
  • nuts like almonds and walnuts
  • fatty fish like salmon, mackerel, tuna, and sardines
  • fruits such as strawberries, blueberries, cherries, and oranges
  • spices, especially ginger, turmeric, and cayenne
  • green tea contains antioxidant compounds known as catechins, which reduce inflammation

The health risks of inflammatory foods

Not surprisingly, the same foods on an inflammation diet are generally considered bad for our health, including sodas and refined carbohydrates, as well as red meat and processed meats.

Unhealthy foods also contribute to weight gain, which is itself a risk factor for inflammation. Yet in several studies, even after researchers took obesity into account, the link between foods and inflammation remained, which suggests weight gain isn’t the sole driver.

Foods that cause inflammation

Try to avoid or limit these foods as much as possible:

  • refined carbohydrates, such as white bread and pastries
  • French fries and other fried foods
  • soda and other sugar-sweetened beverages
  • red meat (burgers, steaks) and processed meat (hot dogs, sausage)
  • margarine, shortening, and lard

In addition to lowering inflammation, a more natural, less processed diet can have noticeable effects on your physical and emotional health.

The impact of strength training

Strength training also improves chronic inflammation. Strength training’s positive effects on chronic inflammation are probably part of why it is shown to decrease the risk of heart disease and diabetes. To maximize your health gains, train with challenging weights and get adequate rest between your workouts.

Exercise regularly and recover completely. Exercise decreases levels of TNF (tumor necrosis factor) and CRP (C-reactive protein), both of which are involved in systemic inflammation. The key to reaping the benefits of exercise and avoiding chronic inflammation is making sure that you allow enough time for the body to recover after every strenuous session.


Take Control Of Your Metabolism!

October 20th, 2020 by Debbie Martilotta

WHAT DOES IT TAKE TO keep the lights on in the human body? How does the body power everything from blinking and cell repair to washing dishes and running a marathon?
In the simplest terms, all of these activities are powered by calories, which come from the food we eat. This is your metabolism at work.

To support a healthy metabolism, consider making the following eight dietary and activity changes:

  • Take control
  • Eat enough
  • Boost protein intake
  • Eat breakfast
  • Limit sweets and processed foods
  • Stay hydrated
  • Increase or maintain muscle mass
  • Get enough rest

Moving more and eating well can help ensure your metabolism is running as best it can. Your resting metabolic rate is largely determined by three factors:

  • Body size and composition. People who are larger and have more muscle mass tend to have a higher metabolism.
  • Sex. Males tend to have less body fat and ore muscle mass, leading to a higher metabolism.
  • Age. As you age, you lose muscle mass and your metabolism slows.

For example, a sedentary 55-year-old woman who’s 5′ 4″ tall and weighs 175 pounds only needs about 1,400 calories per day to keep the body going. By contrast, a 55-year-old male who’s 6′ tall and weighs 200 pounds needs nearly 1,800 calories a day to service the basic needs of maintaining the body at rest. When you add in exercise or physical activity, those needs increase no matter who you are.

Weight gain is more likely a product of a calorie surplus from eating and a decline in activity as we get older. That said, you do have control over what and how much you eat and how much you move.

Make a plan and keep track of how much you’re eating, how much you’re moving, and get a sense of how many calories your body needs and burns each day. I advise my clients to keep a food journal if necessary and to eat a “clean” diet. I also schedule 2 30-minute personal training sessions with them weekly and encourage them to enjoy their new strength by staying active between sessions.

Move more, eat often, hydrate, and sleep. Great advice for all of us! Read the entire article from US News here.


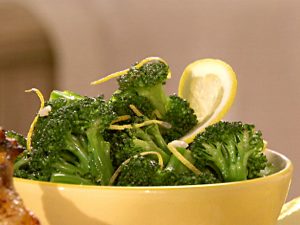
Lemon Broccoli

July 7th, 2020 by Debbie Martilotta

Ingredients

1 Tbsp Extra Virgin Olive Oil
4 Cups large Broccoli florets
1 Pinch Sea Salt
1/2 Lemon cut into wedges

Directions

Heat olive oil in a large sauté pan on medium heat.
Add the broccoli, stirring constantly until it becomes tender.
Add salt. Serve with lemon wedges.

Ready In 7 minutes
Serves 4


by Dr. Mark Hyman